A cup can look convincing until you draw the rim. Suddenly the opening becomes pointed, the two sides do not quite meet, or the bowl seems to lean even though it is standing straight. This is a useful drawing problem because the solution begins with looking more carefully at a simple shape.
The circular opening of an upright cup usually appears as an ellipse when viewed at an angle. Its apparent depth changes with your viewpoint. Drawing that relationship clearly helps the whole object feel solid, even before you add colour, pattern or much shading.
I like a plain cup or bowl as a starting subject because you can move around it and check what you see. You do not need an elaborate still life. One object, steady light and a few light construction marks are enough to explore the problem.
This exercise is about building a believable opening and connecting it to the object underneath. Keep the first drawing small enough to repeat, and give yourself room for a second attempt rather than expecting the first outline to be final.
Choose an object with a clear rim
Begin with a simple, symmetrical cup or bowl. A patterned mug can work, but a strong design may distract you from its structure. Put it on a stable surface with the opening visible, and choose a position you can maintain comfortably while drawing.
Notice whether the object is actually symmetrical. Handmade pottery may be slightly irregular. For this first exercise, choose a fairly regular example so you can concentrate on observing perspective rather than deciding which uneven edges belong to the object itself.
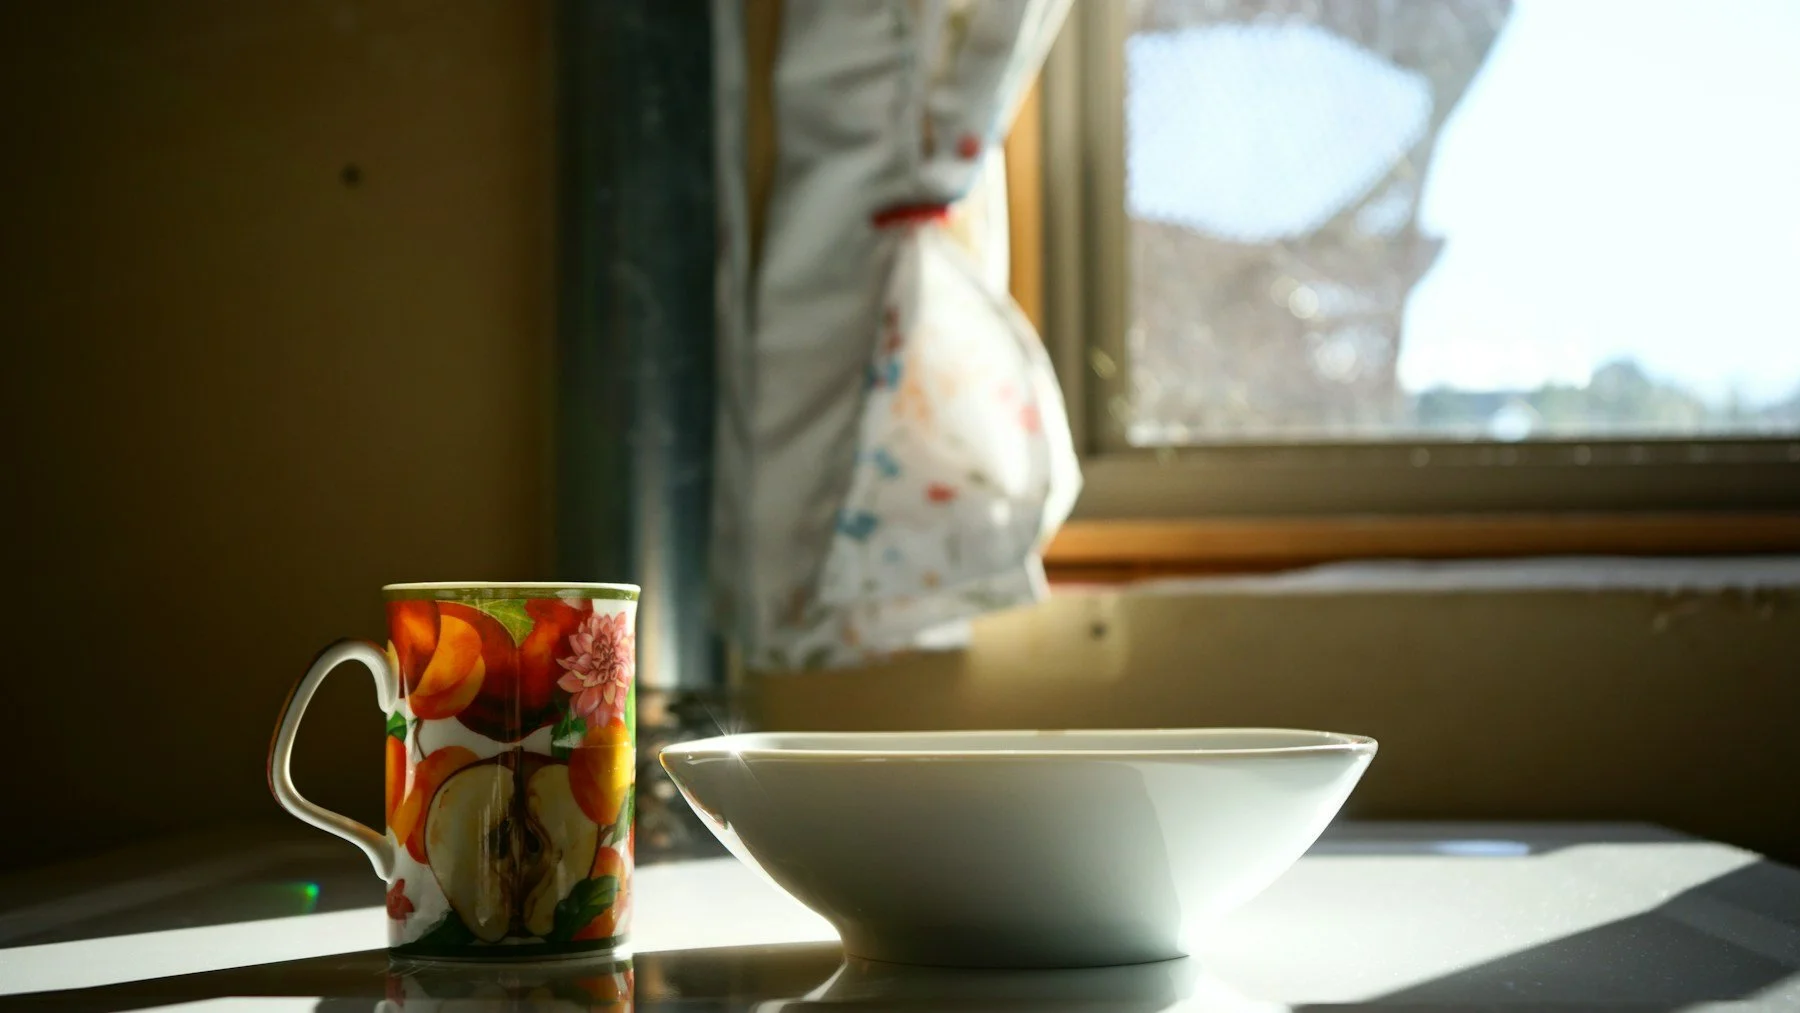
The photograph accompanying this article shows a mug and a broad white bowl by a window. The bowl's opening provides a clear ellipse to observe. It is a reference for the shape of an everyday object, rather than an example of my finished artwork.
Keep your viewpoint steady
Raise your eyes above the bowl and you will see more of its opening. Lower them towards the rim and the ellipse becomes shallower. At roughly the level of the rim, the opening looks almost like a line. That change comes from viewpoint, not from the bowl changing shape.
Choose one position before committing to your drawing. If you sit up, lean forward and then settle back repeatedly, you may combine several different ellipses on the same page. A quick mark for the chair position or the object's location can help you return to the same view after a break.
You do not need to freeze. Simply check the opening again whenever a line stops making sense. Re-establish the view before correcting the drawing, particularly if you have moved the object to examine its handle or base.
Mark width and depth first
Lightly indicate the left and right limits of the opening. Then estimate its front and back limits. Compare the depth with the width: does the opening look very shallow, moderately open or nearly circular from where you are sitting?
Use those four limits to give the shape a small framework. A faint horizontal guide can show the widest direction, while a shorter crossing guide helps you judge the middle. Keep them light enough to remove or absorb into the finished drawing.
Avoid importing a familiar oval from memory. The opening in front of you might be much flatter than the shape your hand wants to draw. Comparing two simple dimensions is usually more useful than repeatedly tracing an uncertain curve.
Draw a continuous curved shape
Let the ellipse curve smoothly around its ends. It should not become two arcs joined at sharp corners. The left and right extremes are rounded turns, even when the opening is quite shallow. Pointed ends make the rim look folded or pinched.
Try moving your hand through the shape just above the paper before making a light mark. Then draw the whole ellipse loosely, with a relaxed movement. You can make a second light pass to refine it, but avoid building a thick ring of increasingly hesitant corrections.
If one end feels wrong, compare it with the other and with the reference. Is the curve too abrupt? Have you moved the widest point? Adjust the construction lightly rather than darkening one side until it appears to match the other by weight alone.
Connect the rim to the sides
Once the opening is established, bring the cup or bowl's sides down from it. Observe whether they are nearly vertical, taper towards the base or curve outward before narrowing. The ellipse belongs to a three-dimensional form, not to an isolated shape floating above a container.
Check how each side meets the rim. An abrupt change of direction can make the object look dented. A gentle connection usually describes the continuous ceramic surface more convincingly, although the particular profile of the subject remains your guide.
For a symmetrical object standing upright, compare the sides around a light centre line. They do not need to be mechanically identical in the finished drawing. The guide simply helps you notice an unintended lean before you spend time on detail.
Observe the thickness of the edge
Many cups have a visible lip, but that does not mean drawing a second identical ellipse inside the first at an arbitrary distance. Look at where the thickness is visible, how wide it appears and which edges are strongest from your viewpoint.
The inner edge may be clearer at the back of the opening, while the outside front edge describes the nearer wall. A dark drink, a pale interior and reflected light can all change which boundary you notice. Draw the observed shapes rather than outlining every possible edge equally.
Keep the far edge light initially. If it becomes as heavy as the closest edge, the opening may look like a dark symbol printed on the object. A little variation in line strength can suggest depth without requiring a complicated tonal drawing.
Check the base and any handle
Look at the base as part of the same form. Its visible curve will depend on the shape of the object and your view. Do not copy the rim ellipse automatically: a bowl may have a much smaller foot, and a mug may hide part of its base against the table.
Add a handle only after the main body feels stable. Mark its outer extent and the space inside it before drawing the smaller curves. Check where it attaches to the cup, because those attachment points help explain the handle's direction.
A useful test is to cover the handle with your hand and look at the body alone. If the cup still seems to lean, the handle will not fix it. Return to the rim, centre line and sides while the construction is still easy to adjust.
Add enough tone to explain the opening
Choose a few broad light and dark areas rather than shading every patch immediately. The interior of a bowl may contain a soft shadow, while the nearer rim catches light. Compare those areas with the outside wall and the shadow on the table.
Leave the brightest parts of a pale rim as clean paper where appropriate. Build adjacent shading gradually so the edge emerges from a change of value. You do not need to draw a heavy outline around the highlight to make it visible.
Keep the cast shadow related to the light source. It helps the object sit on the surface, but it cannot repair an unstable ellipse. If the opening still feels wrong, make that structural adjustment before adding more tone.
Repeat the study from another height
After finishing one small study, move your viewpoint higher or lower and draw a second opening beside it. Compare the two before drawing the rest of the object. This makes the change in apparent depth easier to understand than a single, highly finished drawing.
Write one useful observation beside each study: perhaps “ends need rounder turns” or “opening becomes shallower as I lower my eyes”. A specific note gives the next attempt a direction and makes the page useful beyond its appearance.
The aim is to recognise the relationship more confidently. Some ellipses will still look awkward, and that is useful information. Repeated observation gives you more to work with than measuring success by whether every line looked confident from the beginning.
Use a simple checking sequence
Before refining the drawing, compare the opening with the reference in three separate passes. First check its overall width. Next compare its depth at the centre. Finally look at the turns at either end. Keeping those questions separate makes a correction easier to identify than trying to fix the whole oval at once.
If the two halves seem uneven, turn the sketchbook upside down briefly, then return it to the original position. This can interrupt your familiarity with the drawing. Use the fresh impression to locate a problem, then check it against the actual bowl rather than correcting solely from how an upside-down sketch feels.
For another study, rotate the object without changing your eye height. A plain circular rim should retain a similar overall ellipse if the object stays upright, while the handle and surface pattern move. That comparison helps separate the construction of the opening from the decorative details that can pull your attention away from it.
Save one unfinished construction beside a more developed study. The light guides can remind you how the form was established before shading. In your next drawing, revisit that sequence rather than copying only the finished outline; the decisions behind the shape are the part you can apply to a different cup or bowl.
Keep the exercise small enough to repeat on another day. A page of several observed openings can teach you more about the relationship between viewpoint and depth than one drawing you keep polishing after you have stopped looking carefully. Compare the studies and choose one clear observation to carry into your next subject.
When choosing your next reference, begin with a rim you can see clearly against its background. A patterned object can be enjoyable, but the pattern should not hide the opening you are studying. Once that simple construction feels easier to judge, introduce a more complicated surface and notice what additional decisions it creates.
Equipment to use
A graphite pencil, an eraser and ordinary drawing paper are enough. An HB or similar pencil can make light construction lines and a modest range of tone. Use a plain cup or bowl with a visible rim, plus a stable table and one consistent light source.
Avoid choosing equipment so soft or dark that the first mark becomes difficult to change. You want room to compare and adjust. A scrap sheet for a few loose ellipse movements can help you settle into the exercise before starting the observed study.
Ready to take the next step?
If you would like help making everyday objects feel more solid on the page, I offer friendly, personalised art lessons in Teddington and the surrounding areas. We can work through proportion, ellipses and tone at a pace that suits your experience and interests.
Let’s discuss your drawing or a portrait
Tell me what you would like to learn, or ask about a commissioned pet portrait or house illustration. Send an enquiry and we can discuss a sensible starting point together.